Creating Panoramas with PTGui and Panotools
Introduction -
Loading the images and automatic control point generation
- Panorama settings and projection types
- Revising control points and levelling
the horizon - Stitching
and blending
|
This is an introduction into basic stitching techniques
using Panotools and PTGui in five steps.
If you are already familiar with the basics and are more interested
in creating full spherical panoramas using a fisheye, then please look
here!
|
Software:
The following Software is used during this tutorial. You can click
on the hyperlinks to go to the homepage of the respective Software Developer/Company:
|
Thanks to Brooks
Leffler for proof-reading and correcting this tutorial!
A first introduction to PTGui:
| You will occasionally see such green boxes in the
text. The text inside will discuss special topics which are not relevant
for understanding the basic process. Please note that the methods
discussed here are only a subset of techniques for creating a VR-Panorama.
You are invited also just to research your own methods - and not only follow
this tutorial word by word...
|
When starting PTGui you will notice 2 different windows. The Main Window...
...and the "Panorama Editor" window:
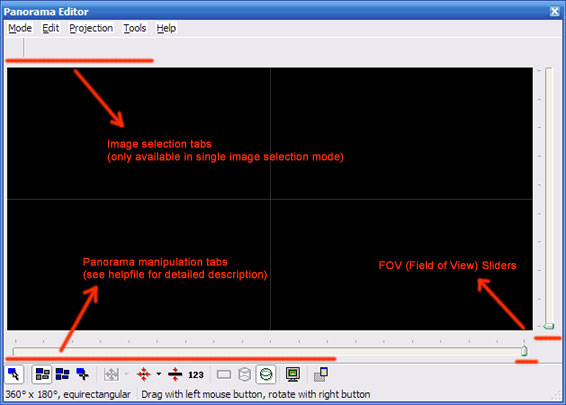
- The main window will assist you in the correct workflow for panorama
creation. We will mainly follow the given tab sequence.
- The editor window will show your working progress visually and will
enable editing your panorama through "point and shoot" interaction.
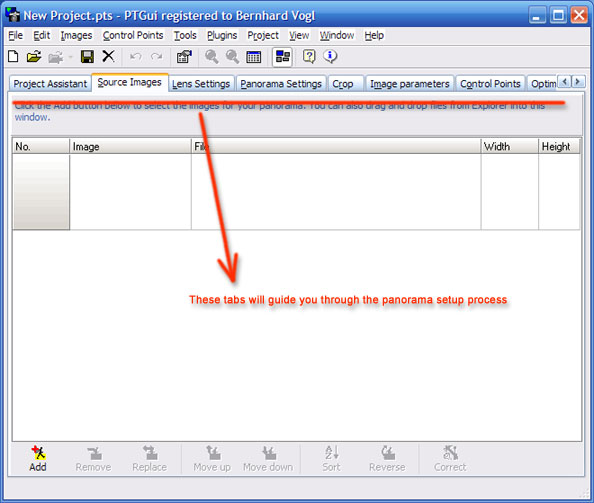
We will now create a panorama by using 5 photos, shot handheld
in portrait mode.
If you want to follow the tutorial by using my example pictures, you can
download them here (1.8 MB) and extract them
to a folder called "C:\tutorial".
In comparison to the previous versions of PTGui, Ver. 5
has tons of new features - one of them is a very helpful Assistant which
we will heavily use for creating our panorama.
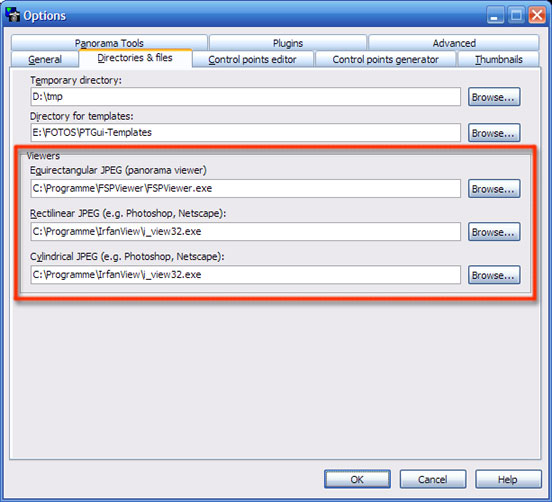
Before we start for the first time, we have to define some
helper applications - at least an image viewer to be able to preview our
stitching results. Go to the menu "Tools" - "Options" and select the tab
"Directories & Files". Define the correct path to your installed viewer
application(s) as shown below:
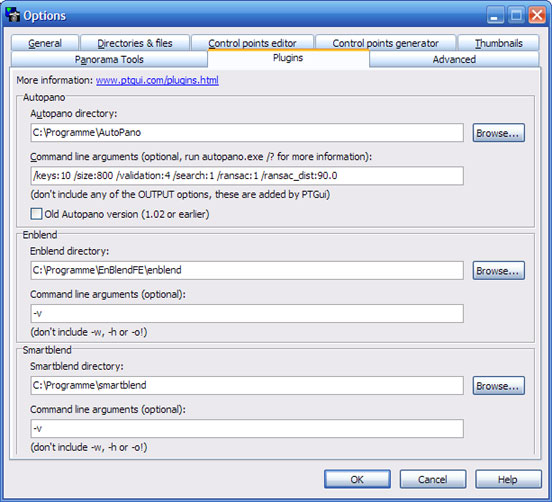
You may also want to configure your plugins if you plan to use them. Here
is an example:
Next step: Selecting your images
|