Go here if you look for
an updated tutorial for PTGui V5 and above!
Part 4: The Zenith-Image
There is one image that I haven't mentioned until now: The zenith- or
sky-image.
We need a special treatment for this one. We will now insert the image in
our panorama, optimize it and manually add it with an image editor
afterwards.
Please insert the image to your panorama. Don't forget to
copy the crop-circle to your added image.
Also, add a checkmark under "Lens Settings" for "Use individual lens
parameters" for this image (number 4). This is done because of the
assumption that zenith-images heavily deviate from the nodal-point when
photographing without the aid of a tilt-able panohead.
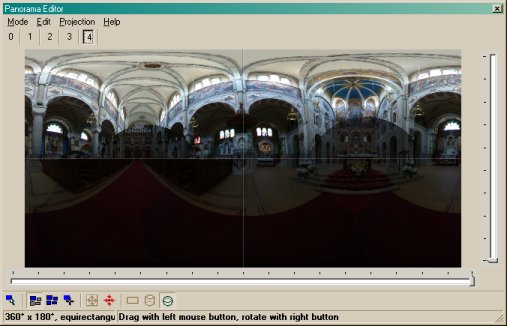
Pull the image roughly to the final destination on top of the panorama: Drag
the zenith image upwards to top position (after a second, the editor will
refresh and display it distributed in the upper third of the editor window).
Now, drag the image left/right until it roughly fits to the lower part of
the panorama.
|
If you have no identifyable features in your
image: After dragging the image upwards, enter the (rough) yaw of the
image in the image property window. This is the degree reading of your
panoramic head (if you used one). A rough alignment will be sufficient.
You can do a smooth blending with Enblend or with the layer brush in
Photoshop.
If you need further assistance in using Enblend to stitch a smooth
zenith or nadir, you may look at this article in the Panotools Wiki:
How to use enblend for patching zenith and nadir images |
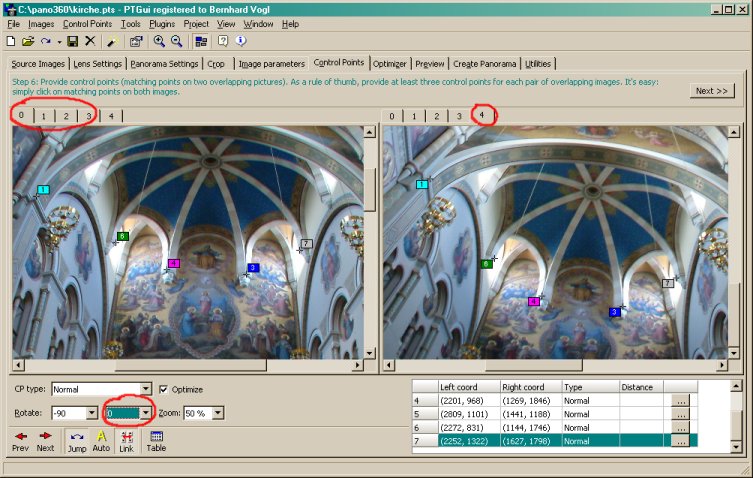
Go to "Control Points" and use the right window for viewing
the zenith image. On the left side you can now page through the 4 other
images to set some control points. Use the "Rotate" drop-down for your
convenience (which will not impact your final panorama).
Now we have to adapt the optimizer for our final run:
Uncheck all parameters you have already optimized. The window will look like
this:
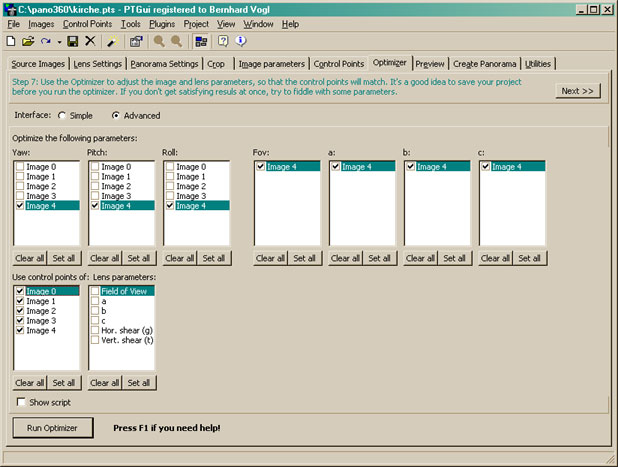
You don't need to get a perfect optimization. All you
need are a few degrees to fill the hole in the upper center of the image.
If you love risky situations you can also optimize the rest
of the images. But it will a good idea to save the project first....
| When optimizing too often, it could happen that the optimizer would
get caught in a bad sub-optimum. In this case, reset "Lens Parameters" (FOV, a,b,c) and retry. |
Part 5: Assembling the Images |