Go here if you look for
an updated tutorial for PTGui V5 and above!
Part 2: PTGui and Autopano
You have your first images on your hard disk?
OK - to give us plenty of work to do I have chosen a real
and "imperfect" set of images. They were taken handheld and do not
meet the nodal point!
If you want to, you can also use my source
images (reduced quality, 3.4 MB download)
|
Fisheye lenses tend to have very
recognizable light falloff on the outer parts of the image. Also
chromatic aberrations are a big issue. You may want to minimize these
flaws before stitching your panorama.
Here are some good resources how this can be done:
PTShift by Eric
Gerds
More technical background about chromatic aberration can be found at the
homepages of
Jim Watters and
Erik Krause. |
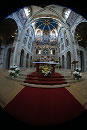
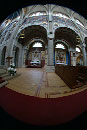
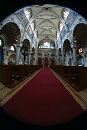
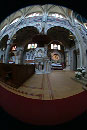
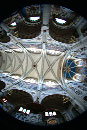
The images show the recently renovated "Kloster-
und Wallfahrtskirche der Unbeschuhten Karmeliten" in Vienna.
The first 4 images are taken in portrait mode. The 5th image
is the so called zenith- or sky-image. I did not shoot a nadir- (or
floor-)image because of the regular texture of the floor.
To capture the high dynamic range of the interior i have
slightly under-exposed. To get the correct exposure, we have to adapt the
brightness of the finished panorama.
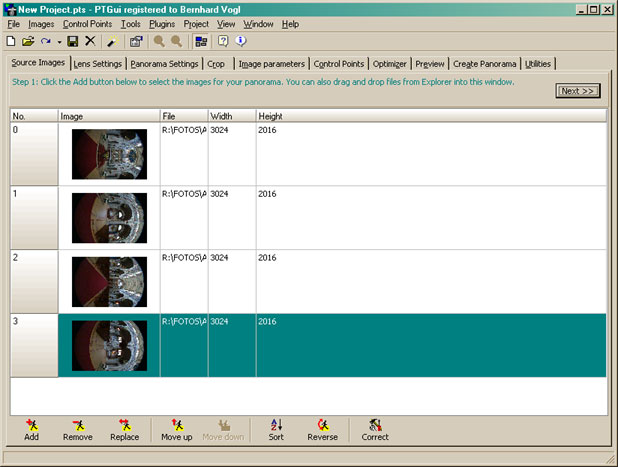
Please start now by opening PTGui. First we will only use the first 4
images.
Load them:
For further processing the images, we need to rotate them to portrait
mode.
A simple method is to use the "PTGui Project Wizard" with the following
settings: "360 degree single row panorama", 2 steps ahead use the button
"Rotate Counterclockwise". Afterwards click
"cancel" to abort.
As a nice side effect we already have pre-positioned our source images,
although the result looks a little quirky:
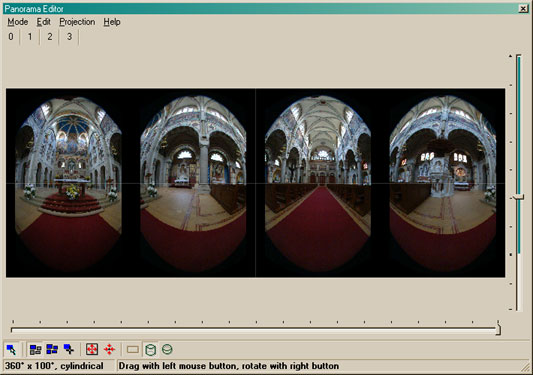
We will now bring that in order::
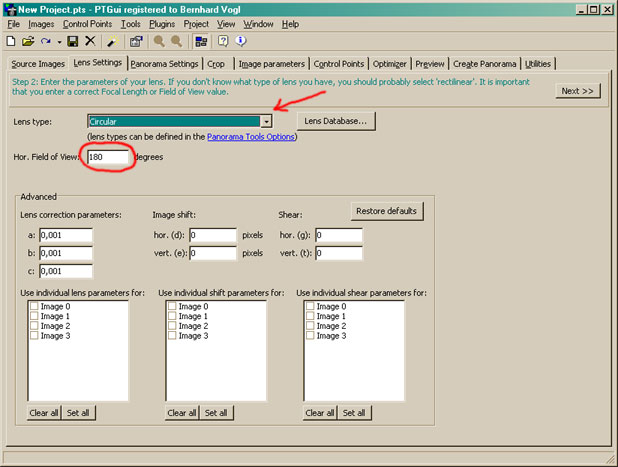
- Go to the tab "Lens Settings".
The Lens Type is "Circular".-> Using a recent version
of PTGui you will already have this Lens Type.
You will notice that now only the "Horizontal Field of View" can
be entered. A simple and sufficient value could be 180.
If PTGui complains about entering a value above 120° you have not
installed the correctly adapted version of pano12.dll (or you may have
installed it in a wrong location)
All other settings will be left at the default values.
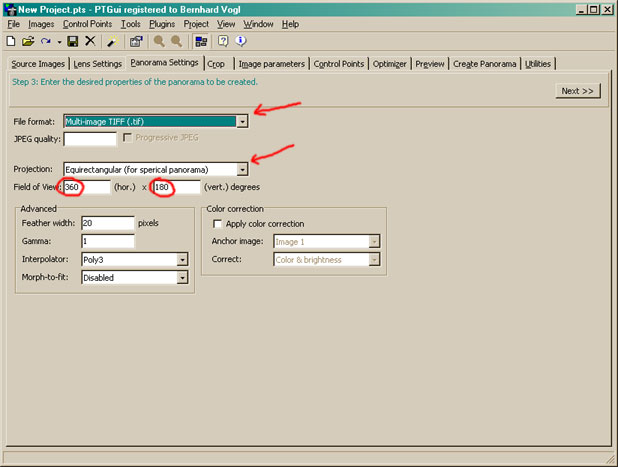
- Now click on the tab "Panorama Setting"
We will need the File-Format "Multi-Image TIFF" for later use of enblend.
Projection must be changed to "Equirectangular". This
is the only type capable of projecting a full 360x180 panorama on a
plane. Also adapt the field of view to full 360x180°:
You will notice that the "Panorama Editor" window shows the first
impression of your full panorama:
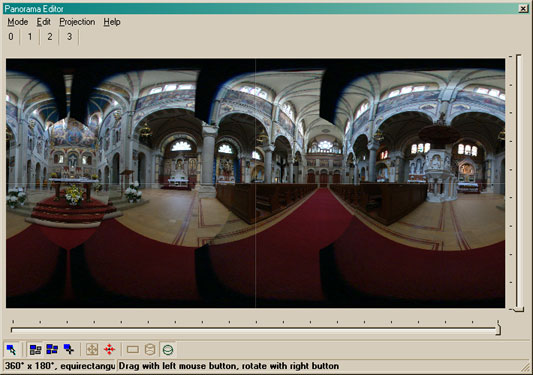
Don't worry about the black edges. You can remove them by clicking on the
"Crop"-tab.
|
Cropping the image is helpful for visualizing the
panorama in the editor window but it is not really needed. In fact there
are some disadvantages to cropping the image: The creation of the
panorama will take more time and full 16bit images are silently
downgraded to 8bit color depth (at least in our case, where the crop circle
leaves the image boundaries). |
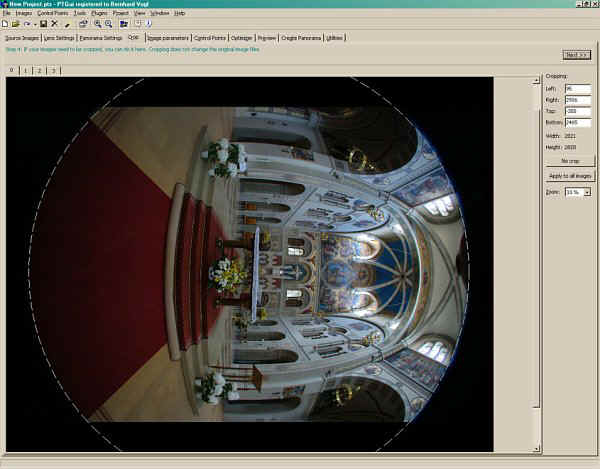
With a click on the button "Apply to all images" we will transfer the
crop to the rest of the images.
If you look closely you will notice that PTGui automatically adapts the
field of view of your lens. This is OK - we use a guessed value which
normally would be about 170-180 degrees of a 8mm fisheye on a DSLR.
Autopano:
We will now use the external tool "Autopano" to automagically create some
control points for our panorama.
I hope you already have told PTGui where to find your autopano.exe. If
not, please do so now (int the Menu "Options"). You can also leave some
parameters for Autopano's command line there. Here are some values that work
acceptably for fisheye lenses:
/size:800 /keys:30 /ransac:1 /search:1
Finding the "right" options for Autopano
depends heavily on the way you take your images and the scene itself. If you
want to know further details about choosing parameters you may follow
the discussions at the
Panotools-List where i also thankfully got some good tips for
parameter combination.
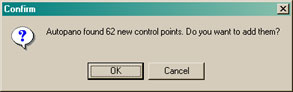
In my example images you will notice a very special problem: there are
quite many wrong control points. This is due the nature of the scene,
having many recurring ornaments. |
Now start Autopano through the Menu "Plugins"
This is now a good time to make some fresh coffe and feed the cats - you
won't miss anything exiting the next minutes...
As soon as Autopano has finished you will see a message appearing on
your screen:
Now advance to Part 3: Fine-tuning with
PTGui |