The final Step: Creating the Panorama and
exporting to QTVR
Maybe you would like to correct some minor flaws in your
panorama. The last (and maybe best) option to do so is by using Pano2QTVR.
A starters tutorial for Pano2QTVR can be found on
pano2qtvr.com.
Before we can convert the Panorama to Quicktime, we have to
create a ready-to-use equirectangular Panorama with PTGui. We will do so at
the tab [Create PAnorama].
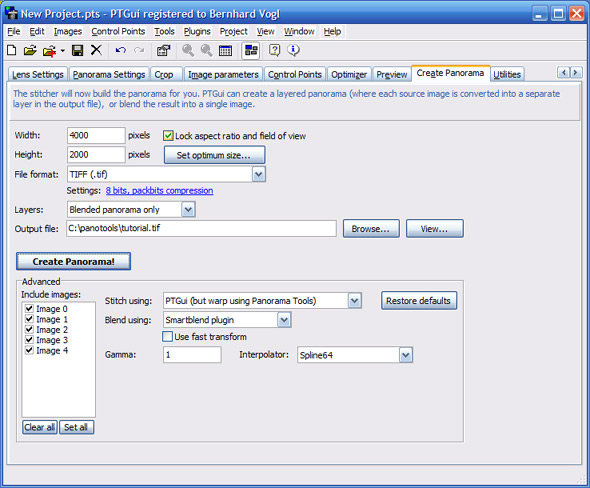
We will use an output size of 4000x2000. This is a good
compromise between Resolution for Fullscreen-Panoramas and filesize.
File format shall be TIFF. So we won't loose Quality of
the panorama through compression.
Also we won't create layers of the transformed source images. This is only
useful if you want to further edit seams of the panorama.
The Stitcher will be PTGui with Panorama-Tools because the
PTGui-Stitcher can't handle input images above 160°.
For blending the seams we will use Smartblend. If you want
to blend higher resolutions of 8000x4000 and above i suggest using enblend
or PTGui Blender because of a better memory usage:
Now click the [Create Panorama] button and take a small
break. The generation of the panorama may take some time...
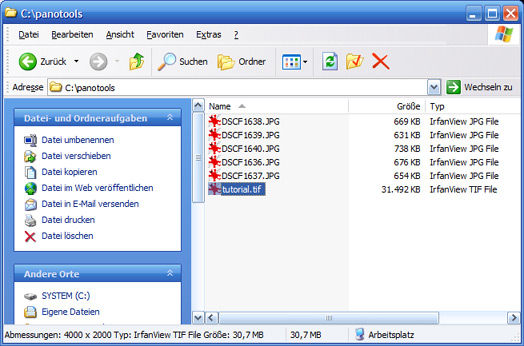
If everything went well, you will soon find the final image on your
harddisk:
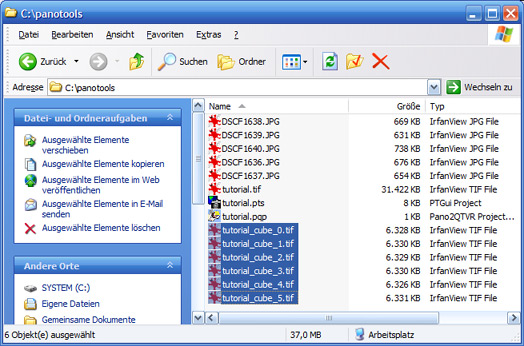
Now it is time for Pano2QTVR.
Create a new project and select our created panorama as source image. Click
the [Convert to Cubic] and confirm the popup-window with [OK].
Now you have the panorama divided into 6 handy cube faces.
This format will keep straight lines straight and therefore simplify your
last editing steps of your panorama - like correcting stitching errors or
inserting a logo on the floor cube (the so-called tripod-cap)
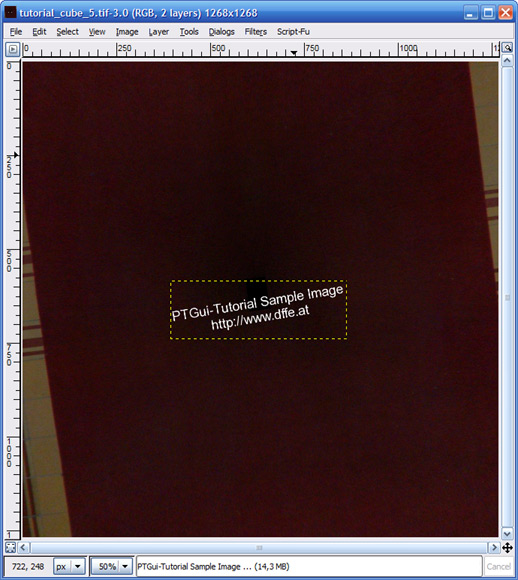
Here is an example of the bottom cubeface, opened in Gimp
to add some text:
We are ready now to convert the Panorama to Quicktime.
Don't forget to enter a name for your Quicktime-Movie in the "Output
Filename"-field and click the button [Create Movie]
After some calculation time, the Quicktime-Movie (QTVR) will
be opened...
Maybe you are not happy with some default settings. They can
be changed easily at the tab [Quicktime Settings].
"Quality" means "quality of the
JPEG-conversion". Smaller values mean smaller filesize (but of course
lower image quality).
"Window Size" will change the size of the
initial Quicktime movie window. This will only apply if you open the
panorama standalone or don't set a special window size (like fullscreen -
see below) for the published panorama.
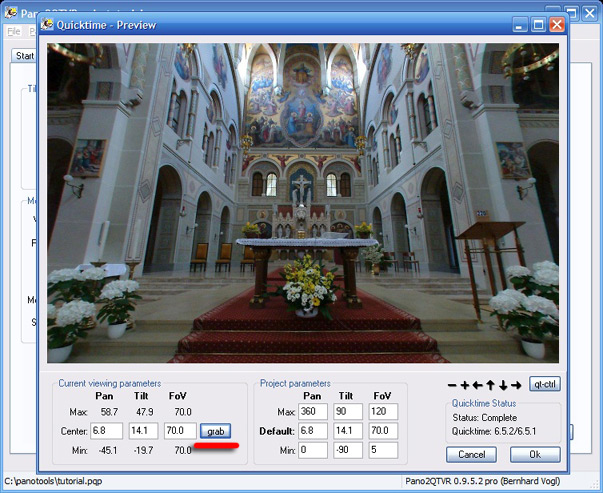
The "Viewing Parameters" can be assignet via
GUI. You don't have to guess the values:
After having found the correct initial view, click [Grab] and [OK].
Re-generate the Quicktime movie with the button [Create Movie].
If you want to integrate your panorama on your webpage:
Happy "panographing" and take a look down the page to see
what we have achieved today!
Some examples of QTVR-Panoramas can be found on my
Panorama-page, on
Austria-360,
as well as on Panoramas.dk
and VRMAG, two sites
showcasing state-of-the art QTVRs and projects from various photographers.
Additional panorama-related Tutorials and a growing source
of useful information can be found at the
Panotools-Wiki.